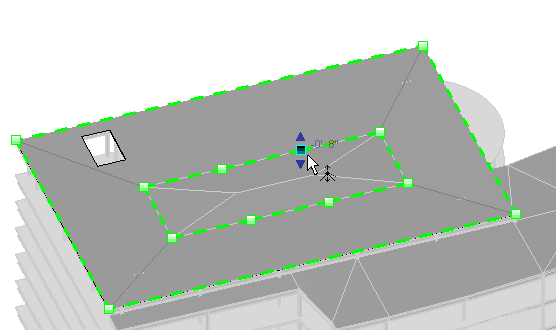
Modifying Points In Revit For Roof Plan

About Editing Floor And Roof Shape Revit Products 2019 Autodesk Knowledge Network

How To Create A Foundation Plan In Revit Architecture Revit Architecture Architecture How To Plan

Revit 2018 Adding Trusses Using Revit Extensions Timber Roof Ads Roof Trusses
Video Shape Editing Roof And Floor Slabs Revit Products 2019 Autodesk Knowledge Network
Modify The Shape Of A Roof Or Structural Floor Revit Products 2019 Autodesk Knowledge Network

Revit For Mep Electrical Lighting Systems Circuits Switches And Annotation Lighting System Architecture Presentation Switches

Make sure define slope is inactive and that the arrow lies on the boundaries.
Modifying points in revit for roof plan.

Revit Architecture Modeling Custom Components Part 1 Revit Architecture Revit Tutorial Architecture Model

Optimizing Your Revit Workstation For Point Clouds Point Cloud Optimization Building Information Modeling

Revit Conceputal Massing 04 Wall Roof By Face Revit Tutorial Autodesk Revit Mass

Mwf Homebuilder Suite Intro In Revit Revit Tutorial Building Information Modeling Revit Architecture
Source : pinterest.com
